はじめに
Flutterのアプリのセットアップが完了したら、AndroidStudioからアプリケーションを新規作成します。
File > New > New Flutter Project...を選びます。
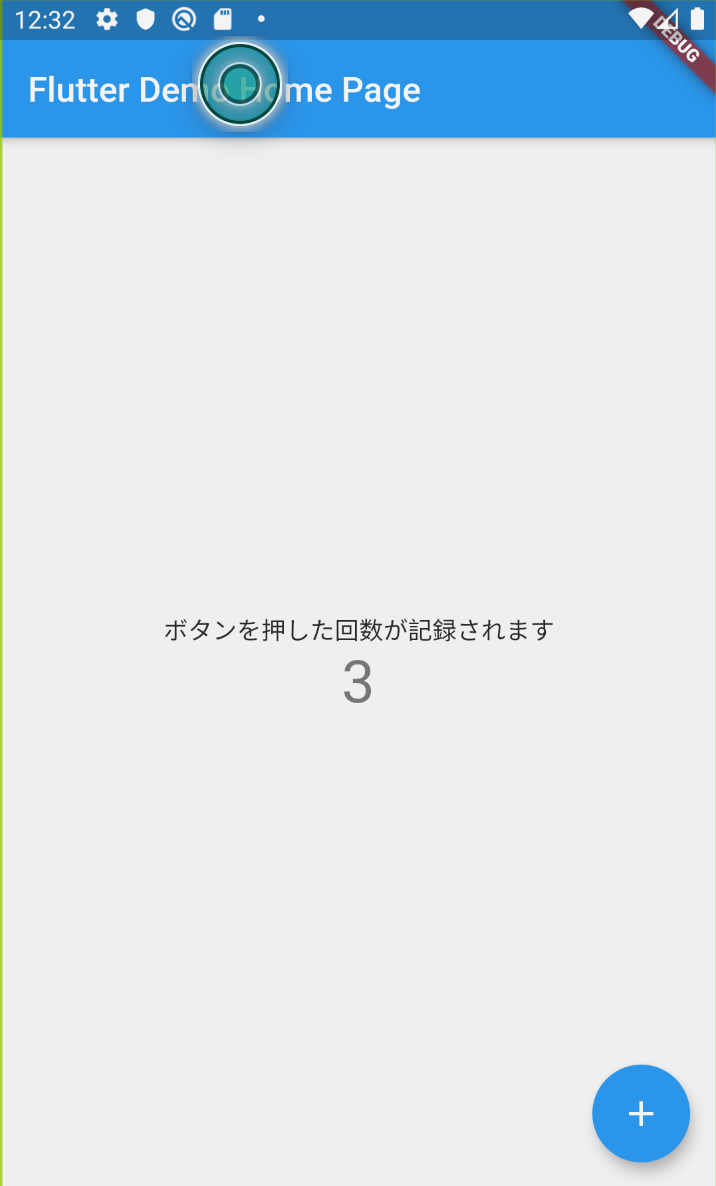
一番左にある「」を選択すると自動でmain.dartを伴ったサンプルアプリが誕生しました。

元々のコード
こちらが自動生成されたコードになります。
import 'package:flutter/material.dart';

void main() => runApp(MyApp());

class MyApp extends StatelessWidget {
  // This widget is the root of your application.
  @override
  Widget build(BuildContext context) {
    return MaterialApp(
      title: 'Flutter Demo',
      theme: ThemeData(
        // This is the theme of your application.
        //
        // Try running your application with "flutter run". You'll see the
        // application has a blue toolbar. Then, without quitting the app, try
        // changing the primarySwatch below to Colors.green and then invoke
        // "hot reload" (press "r" in the console where you ran "flutter run",
        // or simply save your changes to "hot reload" in a Flutter IDE).
        // Notice that the counter didn't reset back to zero; the application
        // is not restarted.
        primarySwatch: Colors.blue,
      ),
      home: MyHomePage(title: 'Flutter Demo Home Page'),
    );
  }
}

class MyHomePage extends StatefulWidget {
  MyHomePage({Key key, this.title}) : super(key: key);

  // This widget is the home page of your application. It is stateful, meaning
  // that it has a State object (defined below) that contains fields that affect
  // how it looks.

  // This class is the configuration for the state. It holds the values (in this
  // case the title) provided by the parent (in this case the App widget) and
  // used by the build method of the State. Fields in a Widget subclass are
  // always marked "final".

  final String title;

  @override
  _MyHomePageState createState() => _MyHomePageState();
}

class _MyHomePageState extends State<MyHomePage> {
  int _counter = 0;

  void _incrementCounter() {
    setState(() {
      // This call to setState tells the Flutter framework that something has
      // changed in this State, which causes it to rerun the build method below
      // so that the display can reflect the updated values. If we changed
      // _counter without calling setState(), then the build method would not be
      // called again, and so nothing would appear to happen.
      _counter++;
    });
  }

  @override
  Widget build(BuildContext context) {
    // This method is rerun every time setState is called, for instance as done
    // by the _incrementCounter method above.
    //
    // The Flutter framework has been optimized to make rerunning build methods
    // fast, so that you can just rebuild anything that needs updating rather
    // than having to individually change instances of widgets.
    return Scaffold(
      appBar: AppBar(
        // Here we take the value from the MyHomePage object that was created by
        // the App.build method, and use it to set our appbar title.
        title: Text(widget.title),
      ),
      body: Center(
        // Center is a layout widget. It takes a single child and positions it
        // in the middle of the parent.
        child: Column(
          // Column is also a layout widget. It takes a list of children and
          // arranges them vertically. By default, it sizes itself to fit its
          // children horizontally, and tries to be as tall as its parent.
          //
          // Invoke "debug painting" (press "p" in the console, choose the
          // "Toggle Debug Paint" action from the Flutter Inspector in Android
          // Studio, or the "Toggle Debug Paint" command in Visual Studio Code)
          // to see the wireframe for each widget.
          //
          // Column has various properties to control how it sizes itself and
          // how it positions its children. Here we use mainAxisAlignment to
          // center the children vertically; the main axis here is the vertical
          // axis because Columns are vertical (the cross axis would be
          // horizontal).
          mainAxisAlignment: MainAxisAlignment.center,
          children: <Widget>[
            Text(
              'ボタンを押した回数が記録されます',
            ),
            Text(
              '$_counter',
              style: Theme.of(context).textTheme.display1,
            ),
          ],
        ),
      ),
      floatingActionButton: FloatingActionButton(
        onPressed: _incrementCounter,
        tooltip: 'Increment',
        child: Icon(Icons.add),
      ), // This trailing comma makes auto-formatting nicer for build methods.
    );
  }
}
RunしてみるとAndroidデバイスのエミュレーターが立ち上がります。

コードの読み解き
さてアプリケーションをさくさく作り進めていきたいところですが、Dartについては全くの未経験者なので一度立ち止まってコードの理解に勤しむことにします。
import
import 'package:flutter/material.dart';
冒頭にあるimport文は外部ライブラリを呼び出しを意味しています。
ライブラリファイルをインポートするときには、上記のようにファイルの URI を指定するために package: ディレクティブを使うことができます。
packages:パッケージ名/公開ライブラリファイル の形式でimportすると、外部ライブラリを読み込む事ができます。
メイン関数
void main() => runApp(MyApp());
voidは、「何も返さない」という意味で戻り値がない場合に用います。
main.dart ファイルを実行すると呼ばれるいわゆるエントリーポイントとなる関数が main 関数です。
アプリを起動するための処理を書くことになります。
MyAppクラス
次にクラスが登場します。
コメントアウトは英語を和訳して下部に日本語を書いていきます。
class MyApp extends StatelessWidget {
  // This widget is the root of your application.
  // このウィジェットはアプリケーションのルート(大元)です。
  @override
  Widget build(BuildContext context) {
    return MaterialApp(
      title: 'Flutter Demo',
      theme: ThemeData(
        // This is the theme of your application.
        // これがあなたのアプリケーションのテーマとなります。
        //
        // Try running your application with "flutter run". You'll see the
        // application has a blue toolbar. Then, without quitting the app, try
        // changing the primarySwatch below to Colors.green and then invoke
        // "hot reload" (press "r" in the console where you ran "flutter run",
        // or simply save your changes to "hot reload" in a Flutter IDE).
        // Notice that the counter didn't reset back to zero; the application
        // is not restarted.
        // "flutter run"というコマンドを実行してみてください。
        // すると青いツールバーが目に入るでしょう。
        // アプリケーションを停止せずに、下のprimarySwatch(メインカラーを司るプロパティ?)を
        // Colors.greenに変更してみてください。
        // そして"ホットリロード"を起動してください。
        // カウンターがゼロにならないことに気づくでしょう。
        // アプリケーションは再起動していないのです。

        primarySwatch: Colors.blue,
      ),
      home: MyHomePage(title: 'Flutter Demo Home Page'),
    );
  }
}
コメントアウトにあったようテーマカラーを変更してみます。
primarySwatch: Colors.green
見事全体のカラーが変更されました。

class MyApp extends StatelessWidget { ... }
次に、クラスに記載のあるextendsとStatelessWidgetについてです。
MyAppクラスはStatelessWidgetをextendsしています。
(これだけだとさっぱり分からない...)
簡単に説明すると、Flutterが用意しているWidgetには2種類あります。
それがStatelessWidgetとStatefulWidgetです。
アプリの状態を表すStateを扱う場合はStatefulWidget、そうでない場合はStatelessWidgetを利用します。
StatelessWidgetの特徴
- StatelessWidgetを継承した1つのクラスで構成されている
- StatelessWidgetはbuildメソッドを持ち、Widgetもしくはテキストを返す
- 返すWidgetはStatefulWidget(MaterialAppとか)でもOK
- 「state(状態)」の概念がないため、動的に変化しないWidget
StatefulWidgetの特徴
- Widgetにstateの概念をいれて拡張したもの
- stateが変化したときに再描画を指示するメソッドが組み込まれている
- StateクラスとWidgetクラスの2つのクラスで構成されている
- StatefulWidgetはbuildメソッドを持たず、createStateメソッドを持ち、これがStateクラスを返す
- StatefulWidget自体はシンプルな構造で複雑な処理等はStateクラスで持つ
- Stateクラスで機能的なメソッドを実装する
- Stateクラスはbuildメソッドをもち、Widgetを返すときに定義したメソッドを
- アクションとして組み込める
- returnできるWIdgetはいくつも種類があり、TextやImage、TextInput、Scaffold等
- ScaffoldはルートページとなるデザインWidgetで基本的なレイアウト構造